

How to select car accessories for performance & style
Choosing the right car accessories can feel overwhelming when faced with thousands of options online. Many buyers unknowingly purchase incompatible parts, waste money on low-quality products, or risk safety issues by skipping certification checks. This guide walks you through eight clear steps to confidently select accessories that enhance both performance and style while avoiding costly mistakes and ensuring your vehicle upgrades deliver real value.
Table of Contents
- Prerequisites: What You Need Before Starting
- Step 1: Verify Vehicle Compatibility
- Step 2: Evaluate Quality And Brand Authenticity
- Step 3: Choose Accessories Based On Performance And Aesthetic Goals
- Step 4: Understand Legal And Safety Requirements
- Step 5: Prepare Tools And Installation Prerequisites
- Step 6: Avoid Common Mistakes And Troubleshoot Issues
- Step 7: Plan Budget And Costs
- Step 8: Measure Expected Results And Outcomes
Key takeaways
| Point | Details | |-------|---------|| | Verify compatibility first | Always confirm fitment using OEM part numbers and manufacturer databases to prevent returns and wasted money. | | Prioritize certified brands | Choose accessories with DOT or ECE certifications to ensure safety, durability, and legal compliance. | | Balance goals strategically | Performance upgrades typically add more resale value than aesthetic modifications, so plan based on your priorities. | | Budget realistically | Include installation costs and factor in long-term value when comparing budget and premium options. | | Know when to seek help | Complex performance parts often require professional installation to protect warranties and prevent damage. |
Prerequisites: what you need before starting
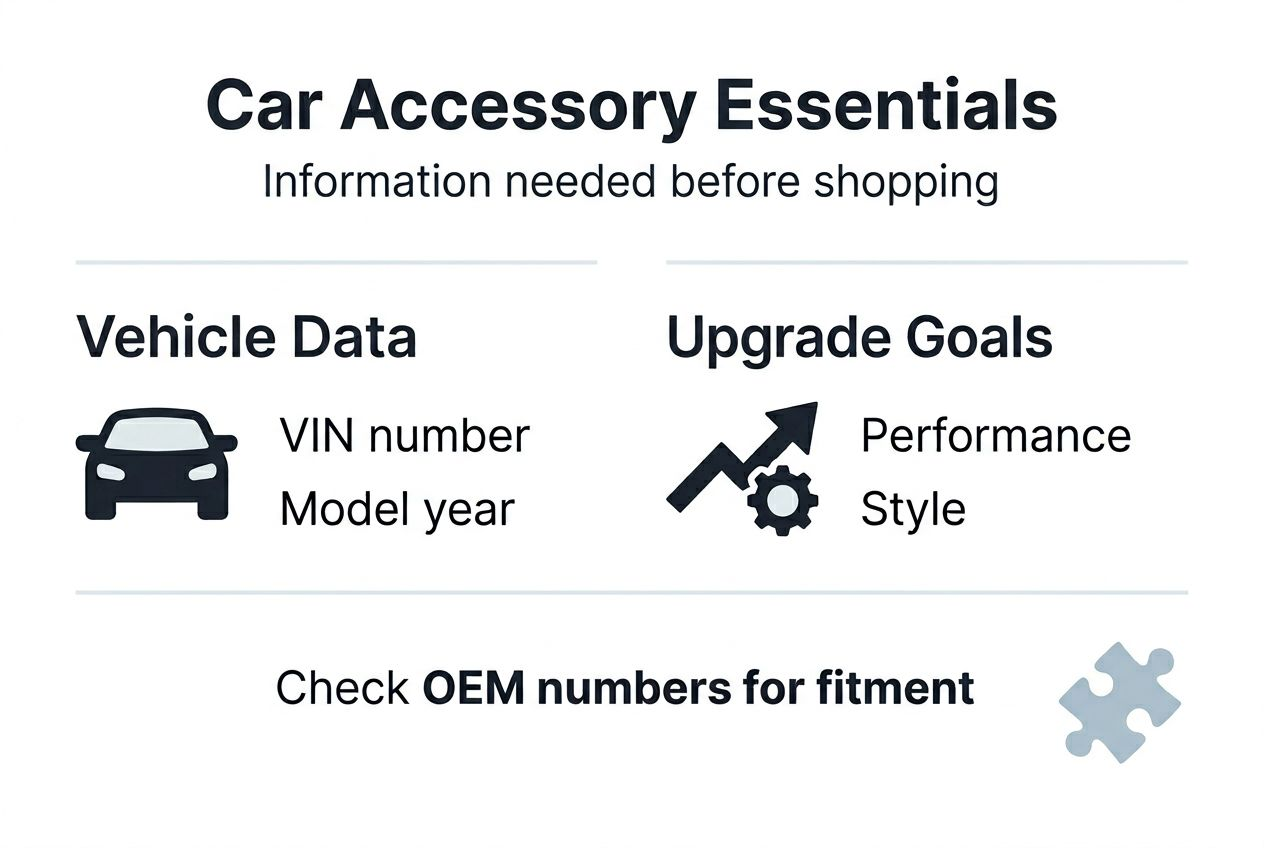
Before diving into accessory selection, gather the essential tools and information that will guide your decisions. You need a basic automotive toolkit including socket sets, torque wrenches, and screwdrivers for potential installation. More importantly, document your vehicle’s exact specifications including make, model, year, and VIN number. This information becomes critical when cross-referencing compatibility.
Define your upgrade goals clearly before browsing products. Are you focused on improving handling and braking performance, or do you want to enhance visual appeal with body kits and lighting? Understanding your priorities helps narrow down thousands of options to accessories that align with your specific needs and budget constraints.
Familiarize yourself with common safety certifications like DOT (Department of Transportation) and ECE (Economic Commission for Europe) standards. These certifications indicate that parts meet minimum safety requirements and are legal for road use in most regions. Knowing which certifications apply to your location saves time and prevents purchasing non-compliant parts.
Pro Tip: Create a spreadsheet listing your vehicle specs, desired upgrades, and budget allocations before shopping. This organizational approach prevents impulse purchases and keeps your project focused on achieving specific performance or aesthetic goals.
| Essential Information | Why It Matters |
|---|---|
| Vehicle VIN number | Ensures precise parts matching across model variations |
| OEM part numbers | Guarantees compatibility with factory specifications |
| Local regulations | Prevents purchasing illegal modifications |
| Installation difficulty | Helps decide between DIY and professional installation |
Research the typical installation time for your chosen accessories. Simple exterior trim pieces might take 30 minutes, while suspension components could require several hours and specialized knowledge. Understanding time requirements helps you plan workspace availability and decide whether professional installation makes sense for complex upgrades.
Step 1: verify vehicle compatibility
Compatibility verification represents the most critical step in accessory selection. 20% of online accessory purchases result in returns due to fitment problems, wasting time and money. Start by locating your vehicle’s OEM part numbers, which you can find in the owner’s manual or by contacting your dealership’s parts department.
Use multiple verification methods to confirm fitment. Online compatibility databases from manufacturers provide searchable tools where you enter your vehicle details and receive compatible part numbers. Cross-reference these results with the retailer’s fitment guide and customer reviews mentioning your specific vehicle model. Never rely solely on vehicle year, as mid-year production changes can alter specifications.
Common mistakes include assuming all parts for a model year fit every trim level or engine variant. A Honda Civicu esistabilisaator designed for Type R models may not fit base trim levels due to different suspension geometry. Always verify the exact trim and engine code when selecting performance parts.
Pro Tip: Take photos of existing parts before ordering replacements. Visual confirmation helps customer service teams verify compatibility and reduces the chance of ordering incorrect variations. Many manufacturers offer part identification services through photo submission.
- Locate your vehicle’s VIN and decode it to identify exact production specifications
- Contact the manufacturer or dealer to obtain OEM part numbers for comparison
- Use online fitment tools from multiple sources to cross-reference compatibility
- Read customer reviews specifically mentioning your vehicle model and year
- Verify that product descriptions explicitly list your vehicle as compatible
- Check for any special installation notes or required modifications
Step 2: evaluate quality and brand authenticity
Quality assessment separates accessories that last from those that fail prematurely. Examine material specifications carefully, looking for reinforced polymers, aircraft-grade aluminum, or hardened steel in structural components. Cheap plastics and thin metals indicate shortcuts in manufacturing that lead to early failure, especially in performance applications.
Reputable brands invest in certification processes that verify their products meet safety and performance standards. Look for DOT, SAE (Society of Automotive Engineers), or ISO certifications displayed prominently in product descriptions. These certifications require independent testing and quality control measures that protect you from substandard products.
Counterfeit parts represent a growing problem in online automotive retail. Warning signs include prices significantly below market average, vague product descriptions, missing certification logos, and sellers with limited customer feedback. Stick with authorized dealers and established brands to avoid compromised safety and performance.
Customer reviews provide valuable insights into real-world durability and performance. Look for patterns in feedback mentioning installation ease, longevity, and whether the product delivered promised improvements. Reviews spanning several months or years offer better reliability indicators than recent purchases where long-term durability remains unknown.
- Choose brands with documented manufacturing standards and quality control processes
- Verify seller authorization through manufacturer websites to avoid counterfeits
- Compare material specifications against OEM parts for equivalent or superior quality
- Check warranty coverage duration and terms as indicators of manufacturer confidence
- Research brand reputation through automotive forums and enthusiast communities
- Prioritize products with detailed technical specifications over vague marketing claims
Step 3: choose accessories based on performance and aesthetic goals
Performance accessories deliver measurable improvements in handling, braking, or power delivery. Upgraded suspension components can improve cornering stability by up to 15%, while high-performance brake pads reduce stopping distances significantly. These modifications typically appeal to driving enthusiasts who prioritize vehicle dynamics over visual changes.
Aesthetic accessories focus on appearance and personalization without necessarily improving performance. Body kits, custom lighting, wheel spacers, and interior trim enhance visual appeal and allow owners to express individual style. While these modifications create striking transformations, they generally contribute less to resale value compared to performance upgrades.
Performance parts increase resale value by 10% to 15%, while aesthetic modifications impact buyer preference but add less monetary value. This distinction matters when planning upgrades with future resale in mind. Performance-focused buyers actively seek upgraded suspension and braking systems, whereas aesthetic preferences vary widely among potential purchasers.
| Accessory Type | Primary Benefit | Resale Impact | Typical Cost Range |
|---|---|---|---|
| Performance suspension | Improved handling and stability | High | $800 to $3,000 |
| Upgraded brake systems | Shorter stopping distances | High | $600 to $2,500 |
| Body kits and spoilers | Enhanced visual appeal | Medium | $400 to $2,000 |
| Custom lighting | Unique appearance | Low | $100 to $800 |
Some accessories bridge both categories by delivering functional improvements with aesthetic benefits. Lightweight forged wheels reduce unsprung weight for better handling while dramatically changing vehicle appearance. High-flow exhaust systems improve engine breathing and create desirable sound characteristics. Prioritize these dual-purpose upgrades when budget constraints require choosing between performance and style.
- Performance upgrades deliver measurable improvements in vehicle dynamics
- Aesthetic modifications allow personalization and style expression
- Dual-purpose accessories provide both functional and visual benefits
- Consider your primary vehicle use when prioritizing upgrade categories
- Track-focused drivers should emphasize performance over appearance
- Daily drivers benefit from balancing comfort, performance, and style
Step 4: understand legal and safety requirements
Safety certifications and legal compliance protect you from fines, insurance complications, and potential liability. Safety certifications like DOT and ECE are crucial for legal and safe vehicle modifications. These standards ensure that aftermarket parts meet minimum performance requirements for road use.
Local regulations vary significantly regarding acceptable modifications. Some jurisdictions restrict aftermarket lighting colors and brightness, exhaust noise levels, suspension height changes, and emissions system modifications. Research your area’s specific requirements before purchasing parts that might violate local ordinances. Non-compliance can result in failed inspections, traffic citations, and voided insurance coverage.
Insurance companies may deny claims if accidents involve vehicles with non-certified modifications. Document all upgrades with receipts and certification papers, then notify your insurance provider about significant changes. Some insurers offer modified vehicle policies that properly cover aftermarket parts and upgrades.
Emissions regulations particularly affect exhaust and intake modifications. Catalytic converter removal or bypass typically violates federal law in the United States, regardless of local inspection requirements. Performance parts labeled as “off-road use only” cannot legally be used on public roads, despite being sold openly online.
Installing non-certified parts or making illegal modifications can void your vehicle warranty, result in failed safety inspections, and create liability issues in accidents. Always verify that accessories meet applicable safety standards and legal requirements before purchase.
- Verify all performance parts carry appropriate safety certifications and legal restrictions
- Research local modification laws through DMV or transportation authority websites
- Maintain documentation proving compliance with safety standards
- Notify insurance providers about significant modifications to ensure coverage
- Avoid “off-road only” parts for street-driven vehicles
- Consult auto parts safety certifications for specific standards
Step 5: prepare tools and installation prerequisites
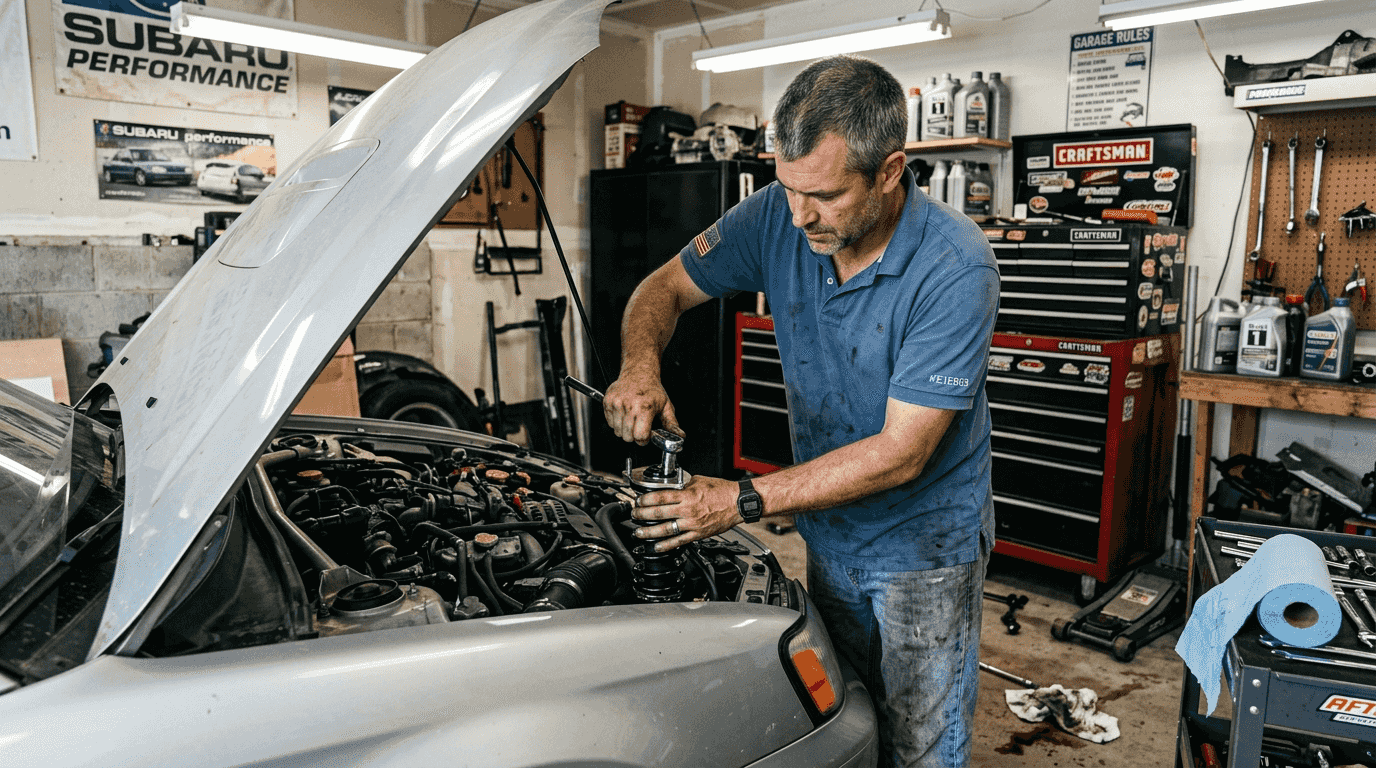
Proper tool preparation prevents installation delays and potential damage to new accessories. A comprehensive socket set with metric and standard sizes covers most fastener types, while a quality torque wrench ensures bolts are tightened to manufacturer specifications. Screwdrivers, pliers, and pry tools round out basic requirements for most accessory installations.
Assess your mechanical skill level honestly before attempting complex installations. Simple accessories like floor mats, exterior trim, or license plate frames require minimal expertise. However, suspension components, brake system upgrades, and electrical modifications demand technical knowledge and experience. Incorrect installation of performance parts can compromise safety and void warranties.
Workspace planning matters significantly for larger projects. Ensure adequate lighting, level ground, and enough space to position tools and parts safely. Many installations require vehicle elevation on jack stands, which necessitates proper safety procedures and stable support surfaces. Never work under a vehicle supported only by a floor jack.
Pro Tip: Create an organized workspace by laying out all parts, hardware, and tools before starting installation. Pre-check that you received all components listed in the parts diagram. This preparation saves hours of frustration and prevents stopping mid-installation to search for missing pieces.
- Invest in quality tools that match fastener specifications to prevent damage
- Review installation instructions completely before beginning work
- Watch video tutorials specific to your vehicle and accessory combination
- Have a backup plan for professional assistance if installation becomes too complex
- Allocate realistic time estimates, typically double the suggested installation duration
- Keep original parts and hardware in case reinstallation becomes necessary
- Document the installation process with photos for future reference or troubleshooting
Step 6: avoid common mistakes and troubleshoot issues
Ignoring compatibility verification represents the most frequent and expensive mistake in accessory selection. Buyers often assume that parts fitting one model year work across all years, or that trim level differences don’t affect fitment. Always confirm exact compatibility using multiple sources before purchasing, even when products appear similar to existing parts.
Underestimating installation complexity leads to damaged parts, stripped bolts, and incomplete projects. Research installation requirements thoroughly, including special tools, technical knowledge, and time commitment. Many performance parts require additional modifications or supporting components not mentioned in basic product descriptions. Read through customer reviews for insights into unexpected installation challenges.
Managing returns promptly when fitment issues arise prevents restocking fees and expedites exchanges. Document problems immediately with photos and detailed descriptions. Contact customer service before attempting to force ill-fitting parts, as installation attempts often void return eligibility. Keep all original packaging and hardware until you confirm proper fitment.
Double-checking torque specifications prevents common problems like loose fasteners or damaged threads. Under-tightening allows parts to shift or separate during use, while over-tightening cracks housings or strips threads. Use a calibrated torque wrench and follow manufacturer specifications precisely, especially for critical safety components.
- Verify fitment before removing any packaging or attempting installation
- Keep detailed records of purchase dates, part numbers, and seller information
- Test fit components without permanent installation when possible
- Know your mechanical limits and seek professional help before causing damage
- Join online communities for your vehicle model to learn from others’ experiences
- Budget extra time and money for unexpected complications or required modifications
Step 7: plan budget and costs
Accessory costs vary dramatically based on quality tier, brand reputation, and performance level. Budget-friendly options typically start around $50 to $200 for basic aesthetic accessories like floor mats or exterior trim. Mid-range performance parts like upgraded brake pads or suspension bushings cost $200 to $800, while premium performance systems can exceed $3,000.
Installation charges add significantly to total project costs. Simple bolt-on accessories might incur $50 to $150 in labor, while complex suspension or brake system installations range from $300 to $1,000 depending on shop rates and job complexity. DIY installation eliminates labor costs but requires tool investment and time commitment.
Long-term value considerations help justify premium product choices. Higher-quality parts typically last longer, perform better, and maintain resale value more effectively than budget alternatives. Calculate cost per year of expected service life rather than focusing solely on initial purchase price. A $600 set of performance brake pads lasting 60,000 miles delivers better value than $200 pads requiring replacement every 20,000 miles.
| Budget Category | Performance Parts | Aesthetic Parts | Installation Cost |
|---|---|---|---|
| Budget | $200 to $500 | $100 to $300 | $50 to $150 |
| Mid-range | $500 to $1,500 | $300 to $800 | $150 to $400 |
| Premium | $1,500 to $5,000 | $800 to $2,500 | $400 to $1,000 |
Hidden costs often surprise first-time upgraders. Supporting modifications, special tools, alignment services, and potential troubleshooting expenses can add 20% to 40% to initial budget estimates. Build a contingency fund covering unexpected needs to avoid stopping projects mid-installation due to cost overruns.
Step 8: measure expected results and outcomes
Establishing performance benchmarks before modifications allows objective assessment of improvements. Document baseline measurements like braking distances, cornering speeds, or subjective handling characteristics. After installation, repeat these measurements under identical conditions to quantify actual gains versus manufacturer claims.
Monitor durability and longevity against brand expectations and warranty coverage. Quality performance parts should match or exceed OEM component lifespan while delivering superior performance. Track mileage and usage conditions to identify premature wear patterns that might indicate quality issues or improper installation.
Aesthetic satisfaction remains subjective but equally important for appearance modifications. Take before and after photos from multiple angles to assess visual impact objectively. Consider whether the modification achieved your intended style goals and whether it complements other vehicle design elements harmoniously.
Document the complete installation process including time required, challenges encountered, and final results. This information helps plan future upgrades more accurately and provides valuable insights for troubleshooting any issues. Share experiences in online communities to help others considering similar modifications.
- Establish clear performance goals and measurement methods before modifications
- Track actual improvements against manufacturer performance claims
- Monitor wear patterns and longevity compared to OEM parts
- Assess whether aesthetic changes align with your original vision
- Calculate total cost including hidden expenses and compare to initial budget
- Document lessons learned to improve planning for future projects
- Share honest reviews to help other enthusiasts make informed decisions
Explore premium car accessories at NordRace
Having learned the essential steps for selecting quality accessories, you can now explore products that meet these rigorous standards. NordRace specializes in certified performance and suspension components designed for automotive enthusiasts who demand both quality and precision.
Our catalog features proven upgrades like the reinforced strut mount bush for Honda, which enhances suspension response and durability beyond OEM specifications. The front reinforced stabilizer link for Honda and Subaru delivers improved handling stability during aggressive cornering. For comprehensive suspension upgrades, the Honda Civic arm bushing complete set provides all necessary components for a complete refresh.
Every product includes detailed fitment information, certification documentation, and installation guidance to ensure compatibility and proper installation. Browse our selection to find parts that align with your specific performance goals and vehicle requirements.
Frequently asked questions
How do I know if a car accessory is compatible with my vehicle?
Check OEM part numbers and use manufacturer compatibility databases that allow you to search by VIN or specific model details. Cross-reference results across multiple sources including retailer fitment guides and customer reviews mentioning your exact vehicle configuration.
Are aftermarket accessories safe to install on any car?
Only accessories carrying proper safety certifications like DOT or ECE standards are safe for road use. Verify that parts meet local legal requirements and carry appropriate certifications before purchasing to ensure insurance coverage and compliance with traffic regulations.
Can I install car accessories myself or should I hire a professional?
Simple accessories like floor mats, trim pieces, or basic exterior components work well for DIY installation with basic tools. Complex performance parts affecting suspension, braking, or safety systems require professional installation to ensure proper function, maintain warranties, and prevent damage.
How much should I budget for car accessory upgrades?
Budget varies widely depending on accessory type and quality level, ranging from $100 for basic aesthetic items to $5,000 for premium performance systems. Include installation costs in your planning, typically adding $50 to $1,000 depending on complexity, unless you possess the skills and tools for DIY installation.